Important Dates for Net Zero Challenge: Austin
April 11 - Net Zero Challenge: Austin launches
May 13 - Last day to submit student video presentations
May 24 - Finalist announcements sent to team sponsors
This Net Zero Challenge is not required Austin ISD curriculum and is intended to take place outside of regular classroom periods. Students can work with a teacher or Austin ISD staff sponsor to find time after school or during open periods to collaborate on this project.
👉🏾 Build Solutions for Austin, Texas!
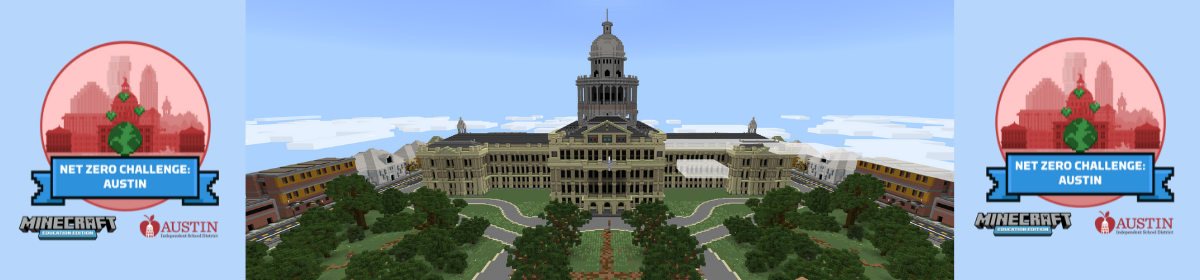
To make this building challenge even more special, the Minecraft Education team created a special Minecraft world! Teams will download the Net Zero: Austin Minecraft World file below and import it into Minecraft: Education Edition. The spawn point starts you at the Texas Capitol. NPCs in the game will share information that you will need before teleporting players to the challenge build plate. Teams have freedom to create anything on and around the build plate.
Download and import this mini-Austin world to get in-game directions. Use the Plan and Build sections below to help develop your fantastic solutions.
(updated link is now iPad-friendly!)
👉🏾 Plan
The goal for each student team is to build a world in Minecraft: Education Edition and submit a video presentation that shows how that world demonstrates answers the Net Zero Challenge: Austin build prompt.
In Minecraft: Education Edition, how might you design a modern transportation system for the city of Austin that meets the city’s Net Zero goals by the year 2040?
An effective challenge build will show student understanding of what Net Zero means and demonstrate creative solutions for how city leaders might improve transportation while reducing the city’s carbon footprint. The Austin ISD Student Guide can provide direction for getting started and questions that may help the team better understand the science involved with the challenge prompt.
(or click here to make a copy for your Google Drive.)
Suggested Team Planning Outline
- Develop understanding of key terms and ideas. What is Net Zero, climate sustainability, climate change, types of city transportation, mobility plans, etc? These resources may be helpful in starting your research:
- 👉🏽 Student directions for using Mackinvia for research
- What is Net Zero?
- NASA: Why Is Carbon Important?
- City of Austin Climate Equity Plan
- EPA Carbon Pollution from Transportation
- Sustainability Websites for Kids
- Austin Strategic Mobility Plan
- Smart City Sweden, sustainability models and considerations
- EPA Transportation Air Pollution Climate Change
- Six Sectors to Climate Change (advanced)
- Answer the challenge prompt. How would your team apply creative thinking to provide some solutions for this prompt? What strategies could the city use to reduce the carbon footprint and improve city transportation?
- Build your ideas in Minecraft: Education Edition. What might your solutions look like? How could the different Minecraft inventory elements be used to show how your solutions would work?
- Review the challenge rubric. This rubric will be used by the judges to select finalists. What is the difference between a good presentation, a great presentation and a brilliant presentation? Maybe meet with your team sponsor or mentor and discuss how your team is designing for a brilliant presentation. zzz (view in new window)
- Lastly, create a two minute video presentation. Capture a tour of your Minecraft world and tell the judges about your strategies and answers that address the challenge prompt. Upload your video to Google Drive and share it with your staff sponsor.
How to record video of your Minecraft world: YouTube video
How to export your Screencastify video as MP4: YouTube video
👉🏾 Build
Student teams will work collaboratively to build models in Minecraft: Education Edition that demonstrate the solutions developed during team planning and research. Use any of the building tools and inventory materials in Creative Mode to demonstrate what your concepts would look like and how they may operate. Teams can use NPC and posters in the game to share information and can use Redstone and other advanced features in Minecraft: Education Edition help demonstrate your transportation solutions.
Still Learning Minecraft?
Basic intro: https://youtu.be/BrSweFC3XUY
Basic Controls: https://youtu.be/mcmYMb67HI0
In Game tutorials for Minecraft: Education Edition: https://youtu.be/hieMlK9cKoM
Use slates and posters in your world: https://youtu.be/JagP_B8cxMM
Using NPCs (non-player characters) : https://youtu.be/xOS8cVtgCDE
Import and export worlds: https://youtu.be/sSjXDPzFrQ0 (Remember: One team member will create the team world and can host it for other members. The creator can export the world as a file and a different member can import that world file to work or host. When transferring worlds to members, consider numbering the export (world1, world2, etc) to keep track of the most recent version.
Host and join worlds: https://youtu.be/IqH0QrUczFw
YouTube Playlist of tutorials: https://youtube.com/playlist?list=PLg9lToc61ftpZjtoCJoPZ8gLyXVk1whOV
Movement with keyboard commands:
W - Move forward
A - Move left
D - Move right
S - Move backwards
F5 - Third Person view
Spacebar - Tap once for jump, double tap and hold for flight
E - Inventory (gathering items for building)
C - Engages Code Builder
SHIFT - Sneak
Movement with the mouse:
Consider the mouse as your head. If you need to look left, move your mouse to the left. Follow the same steps when looking right, looking down and looking up.
Place and break with the mouse (controls on the bottom left of the screen):
The picture on the bottom left of the screen is the mouse. It shows you that if you right-click, you'll place a block and if you left click, you'll break a block.
Crosshair (+ in the center of the screen): The crosshair that is moved with the mouse is where a block will be destroyed or placed. If you don't see the word Place on your mouse picture, you'll know that your crosshair isn't pointed to a place where you can build.
Hotbar (9 boxes at the bottom of the screen): The hotbar is for inventory. It can be accessed by using the number keys (1-9) on your keyboard, or by using the rolling wheel on the mouse to scroll across the hotbar.