
Creating Accessible Documents in Microsoft Word
Microsoft Word is a commonly-used application among individuals with a variety of disabilities, and is reasonably accessible. The text within Word documents can be read by assistive technologies such as screen readers and Braille devices. However, in order for Word documents to be fully accessible, authors must follow the core principles outlined on the Our Requirements page. Below are the basic steps for implementing these core accessibility principles.
Visit Microsoft website for more information about creating Word accessible documents.
Using the most up-to-date version of Microsoft aids in document accessibility. Download these instructions or call the Technology Help Desk at 512-414-9187 for help with installation.
Introduction
- Benefits of creating an accessible document
- PDF accessibility is dependent on the originating software program
- Terms and Terminology
- Significant differences between Mac and PC user softwares
Microsoft Word and Adobe Acrobat Pro X are used through these tutorials on a Windows platform. You must install Adobe Acrobat Pro X software to create accessible documents.
- See Lesson 1: Installing Acrobat Pro on the PDF Accessibility page of the Self-paced Training section.
- Microsoft Office 2013 does not produce accessible documents to the current standards. Older files will need to be recreated, or saved as the current Microsoft Word available through employee's Office 365 account.
- This brief tutorial is recommend on How to Make Old Documents Accessible.
Checking the Heading Structure
- Select the "View" tab at the top of the page.
- PC: Select the checkbox "Navigation Pane" on the View tab to show an outline of the document in the pop-out pane to the left.
- Mac: Select the checkbox "Navigation Pane" and then on the left pop-out pane select the "Outline" icon to show an outline of the document.
- Select a heading in the outline to navigate to it in the document to check the heading style.
- Insert your cursor in the heading on the page and select the "Home" tab to see the heading style in the ribbon.
Styles and Themes
- Video 2013: Use styles and theme
- Video 2016: Use styles and themes
- Customizing Styles
Images and alternative text
- Select the image with your cursor.
- Right click the mouse for the pop-up menu to appear.
- Choose "Format Picture" from the menu list.
- The panel on the right appears. Select the "Layout and Properties" icon.
- Select the triangle to toggle the "Alt Text" sub-tab and type in the "Description" field content specific descriptions.
Alternative text for different content types.
Creating Hyperlinks
Hyperlinks should be one line and include descriptive text.
- Select the "Review" tab at the top.
- Next select the "Accessibility Checker" icon for the inspection results panel on the right to appear.
- Select the hyperlink warning to take you to the page that the offending hyperlink is on.
- Links that are the URL statement e.g. (http://urlname.com) is unclear and not good for accessibility. The user does not know where the link will be taking them.
- To correct this right click on the link and select "Edit Hyperlink" from the pop-up menu.
- In the "Text to Display" field of the Hyperlink dialog box type in a meaningful label e.g. ( visit the Forms page for more information. )
Add hyperlink text and ScreenTip
Recommended extended learning about hyperlinks.
File Properties and More
- When to use alternative text
- Working with Lists
- File Properties
Decorative Images
Decorative images do not require alternative text. However, you will need to use double quote marks ( "" ) to indicate the screen reader should ignore the content.
Using Lists
- Highlight using your cursor to select content you wish to make a list.
- Navigate to the "Home" tab and select icon of the style of list such as bulleted, numbered, or multi-level lists
- Always use Word predefined lists which can be modified in the style ribbon.
- Do not add returns by hitting the enter key. This causes multiple list and can be confusing for people using screen readers
Define new bullets, numbers, and multilevel lists for more information or See Video
Document Properties
- Select "File" tab at the top of the menu bar, and to the left sidebar select the "Info" tab
- Select the arrow by "Properties" on the right side.
- In the dropdown select "Advanced Properties" in the summary tab
- Type a title in the "Title" field. This should be the title of the document similar to the Heading One and not the file name.
- Type an author in the "Author" field. We recommend Austin ISD and the department name.
Additional document properties video instruction.
Converting an Accessible PDF from Word
- Save As Accessible PDF Settings
- Checking File Properties in Acrobat Pro
- Using Accessibility Full Check
For additional information visit Adobe's create and verify PDF accessibility page.
Saving for Accessible PDF from Word
- With your file open in Word select "Save As" then select "More Options" link.
- From the popup dialog box under the "Save As Type" select "PDF" from the dropdown options
- PC: Select the "Options" button. In the popup window select the following:
- create bookmarks
- using headings
- document accessibilities
- document properties
- Select the radio button "Standard Publishing Online and Printing"
- Select Okay
- Mac: Select the radio button "Best for digital distribution and accessibility"
- Save the file.
Confirming PDF from Word Conversion has metadata/ file properties
- Navigate to the saved file and open with Adobe Acrobat Pro, not Adobe Reader.
- At the top menu select "File" and in the dropdown menu select "Properties"
- In the "Description" tab confirm the "Title" and "Author" field have appropriate text.
- Next select the "Initial View" tab and confirm that Show "Document Title" in the dropdown has been selected.
- Select the "Security" tab and confirm that the "Security Method" is set to "No Security".
- Then select the "Advanced" tab to confirm in the Reading Options section towards the bottom of the dialog box that the Language is set to "English" or the language used in the document. Select okay.
Checking for Accessibility
- Select "Tools" on the right to display the right pane and navigate to the "Accessibility" sub-tab.
- If the sub-tab is not available, right click on the pane and choose it from the popup menu, or select it from the toggle triangle at the right of the Tools Pane
- Under the "Accessibility" tab select "Full Check"
- From the popup dialog box leave everything as default and select "Start Checking".
- After the checker has run it will display results on the left either passing items or showing errors to correct.
Advanced Topics in Word
- Creating multiple Table of Contents Video
- Creating Table of Contents Video and General Instruction
- Bookmarks Instruction
- Footnotes and Endnotes Instruction
- Changing color in Word for legibility and tools to check color contrast
Table and Table Headers
- Suggested Video and Instructions for creating tables.
Word has limitations when it comes to making tables accessible. For a simple table with one row of column headers and no nested rows or columns, Word is up to the task. However, more complex tables can only be made accessible within HTML or Adobe PDF (accessible table markup can be added to the PDF using Adobe Acrobat Pro).
Often complex tables can be simplified by breaking them into multiple simple tables with a heading above each.
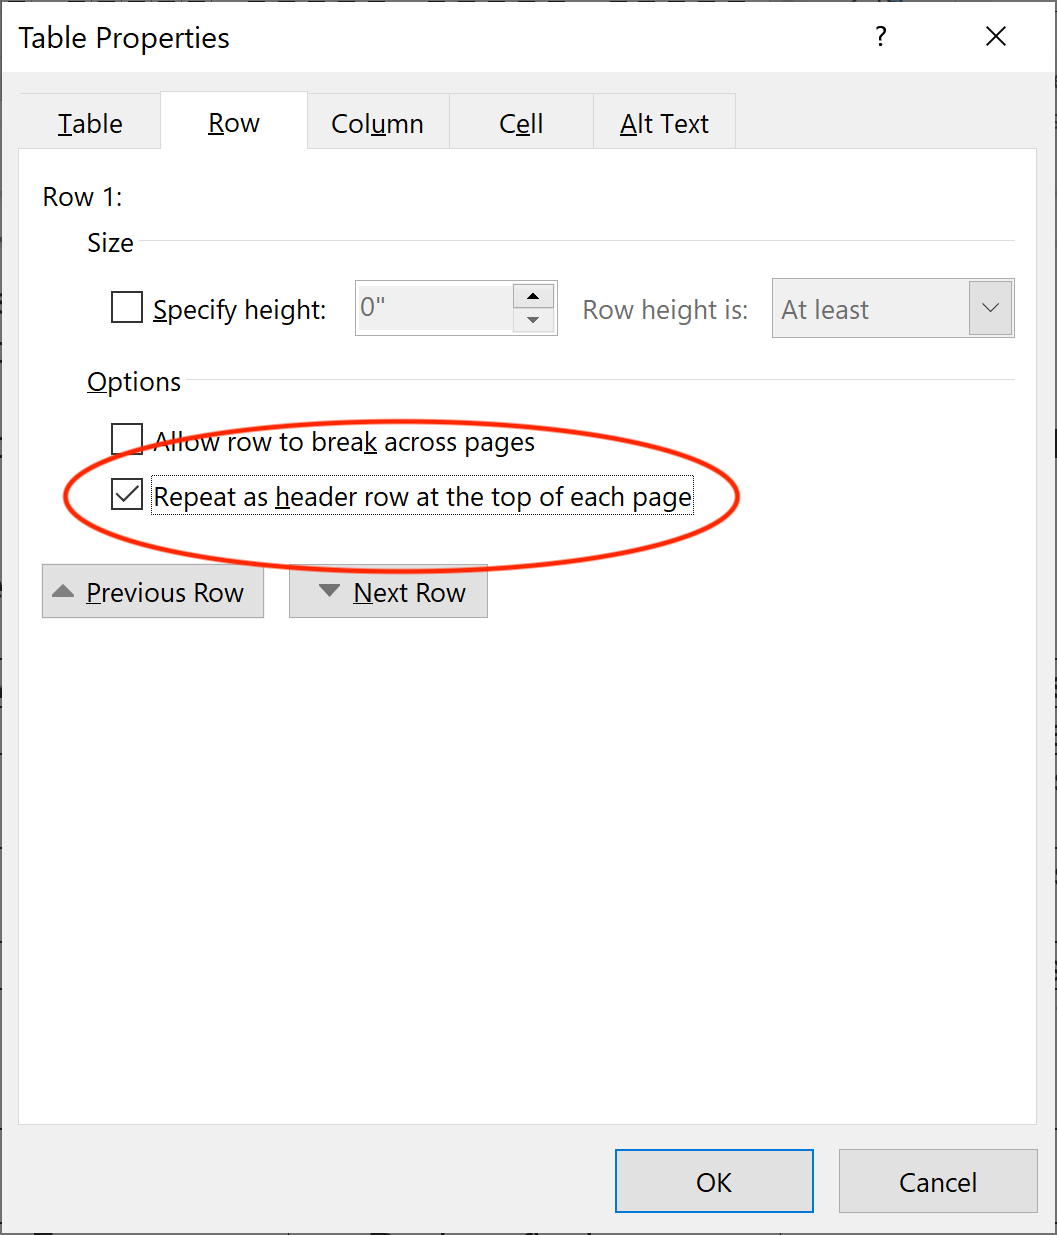
For simple tables, the only step necessary for accessibility is to identify which row contains the column headers. To do this in Word, select that row (Table > Select > Row), then right click the row and select “Table Properties”. This brings up the Table Properties dialog. In this dialog, click the Row tab, and check the checkbox that says “Repeat as header row at the top of each page”.
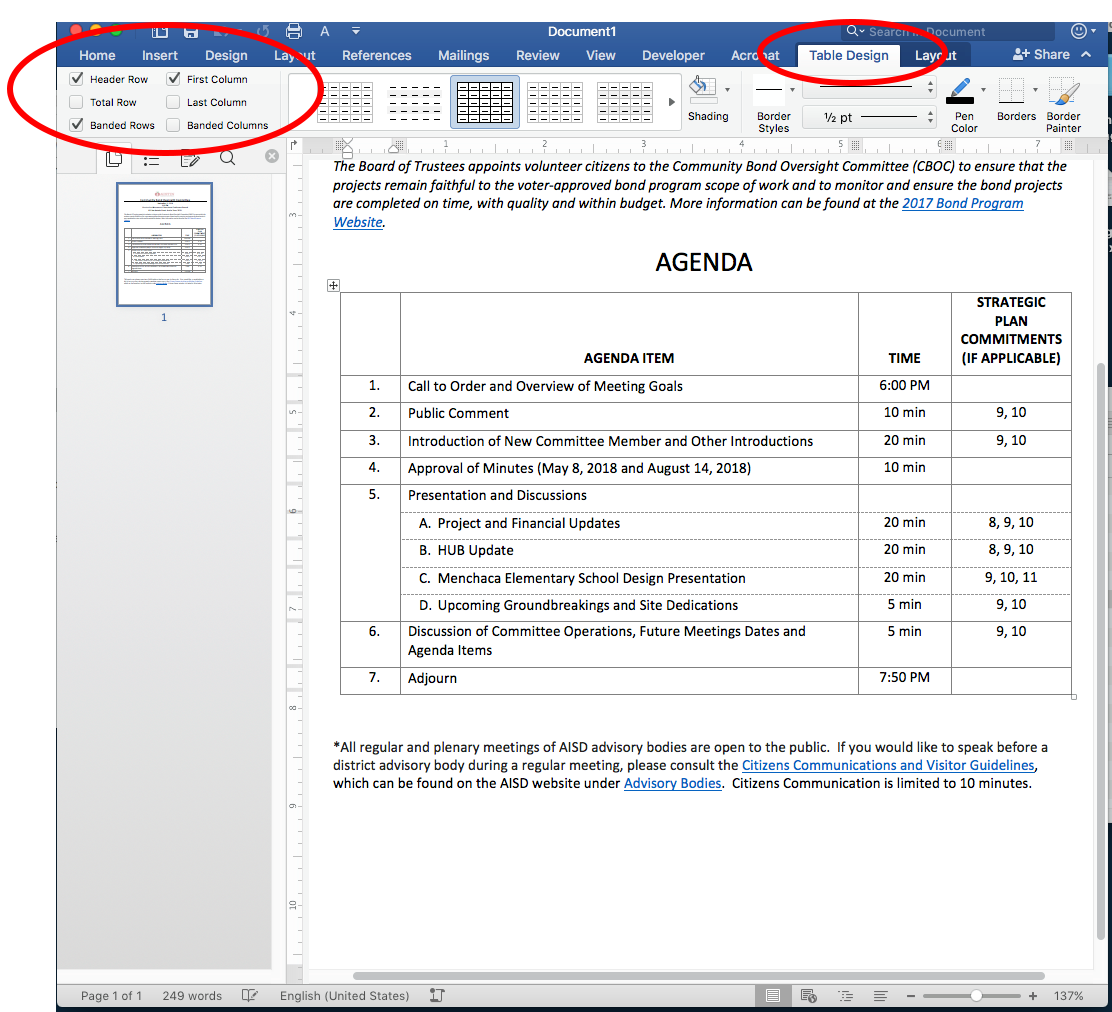
In addition, when creating a table two new tabs will appear in the ribbon. Selecting the Design tab will reveal the Table Styles Option group where you can define your Header Row.
Defining Languages
Using multiple language in one document.
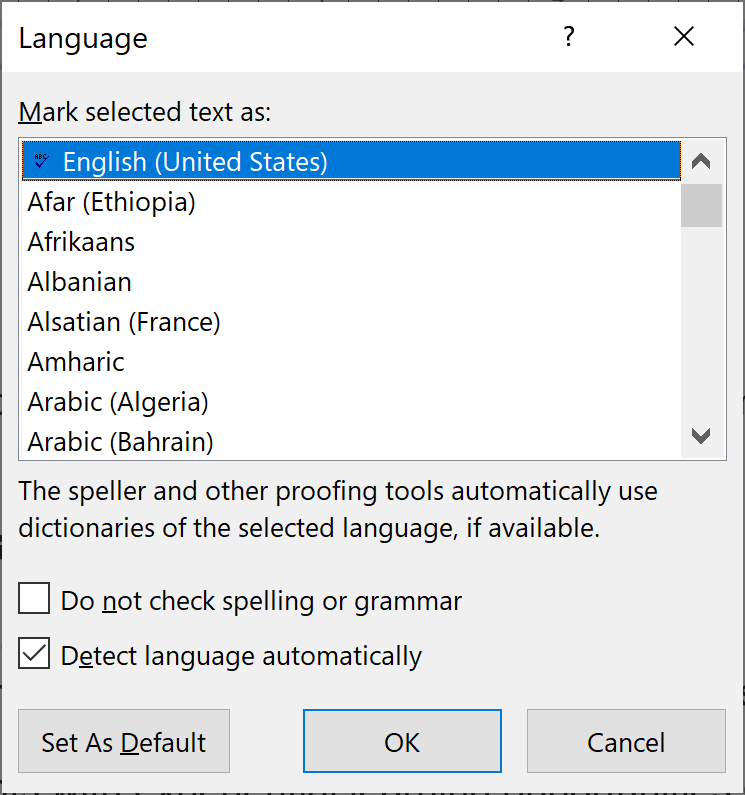
In Office, select Tools > Language from the application menu to define the default language. To define a different language for part of the document, select each foreign language individually, then select Tools > Language to define the language for each.
Multiple languages can be assigned in the the Style Ribbon.
- Highlighting the text and open the "Style" Pane
- Select the style being applied and select the "Modify Style" dropdown option
- This brings up the Modify Style dialog box. Towards the bottom left corner select "Language" from the dropdown menu.
- A list of languages appears, and select the appropriate language based on our content and select "ok"
Note: Currently language settings only effect accessibility of the Word document itself. They do not survive when exported to PDF. If PDF is the final format in which you intend to distribute your document, you will need to define language in the PDF directly using Adobe Acrobat Pro.